WordPress is one of the most widely used open-source technologies for creating websites and blogs today. It’s used by 63 percent of all websites using CMS, and WordPress sites make up 36 percent of all websites currently on the internet. Setup wordpress linux LAMP in Ubuntu 20.04.
There’s no one-size-fits-all approach to getting started with WordPress, and some WordPress setup processes are more complicated than others. If you’re looking to install and manage a WordPress instance on your unmanaged cloud server from the command line, this tutorial is for you. While this method requires more work than a pre-configured WordPress installation, it gives you more control over your WordPress environment.
Depending on your requirements and objectives, you may discover other solutions that are better suited to your needs.
WordPress is an open-source, free-to-use software that you can download and install on your own. However, if you want to publish your site on the internet, you’ll likely need to pay for cloud infrastructure and domain name.
If you’re interested in working on the server side installation and set-up of your WordPress site, you can continue reading this guide.
In this tutorial, we’re going to use a LAMP stack. LAMP is one of the server architecture options for a server that supports WordPress.
We’ll be installing and setting up WordPress through LAMP on Ubuntu 20.
Setup wordpress linux LAMP in Ubuntu 20.04
In this tutorial, we are going to use a LAMP stack (Linux, Apache, MySQL, PHP) which is one of the server architecture options for a server that supports WordPress. LAMP provides you with the Linux Operating System, Apache Web Server, MySQL Database, and PHP Programming Language. In this tutorial, we will be installing and configuring WordPress using LAMP on an Ubuntu server (Linux 20.04).
Install LAMP Stack in Ubuntu 20.04
A LAMP stack is a collection of open-source software that is usually installed together to allow a server to run dynamic websites and web applications written in PHP. LAMP stands for “Linux operating system,” and the Apache web server is used to run the software. The website data is stored in the MySQL database, and the dynamic content is processed in PHP.
Let’s see how to set up an LAMP stack on Ubuntu 20.04.
To get started, you’ll need to have:
◾ Ubuntu 20.04
◾A non-root user account with sudo enabled
◾A basic firewall
Step 1. Install Apache and Update firewall
Apache web server is one of the world’s most widely used web servers. It is well-documented, has a large community of users and has been widely used for most of the web’s history. This makes it an ideal web server to host a website on.
The first thing you need to do is to update your package manager cache to the latest version. If you are using apt for the first time in this session, then you will be asked to provide your apt user password to verify that you have the correct permissions to manage your system packages using apt.
Install Apache:
You will also be asked to confirm the installation of Apache by pressing Y and then ENTER.
Once the installation process is complete, you will need to configure your firewall to accept HTTP traffic. There are various application profiles available in UFW that you can use to achieve this. To see a list of all UFW application profiles currently available, you can run:
Output:
Output:
Available applications:
  Apache
  Apache Full
  Apache Secure
  OpenSSH
Each of these profiles opens only port 80 for normal, unsecured web traffic, and port 443 for TLS/SSL encrypted traffic.
For now, we recommend only allowing connections on port 80.
This is a new Apache installation, and you do not yet have a TLS / SSL certificate configured on your server to allow HTTPS traffic.
To only allow traffic on port 80, use the Apache profile:
sudo ufw allow in "Apache"
Verify the change with following Command
Output
Output
Status: active
To Action From
-- ------ ----
OpenSSH ALLOW Anywhere
Apache ALLOW Anywhere
OpenSSH (v6) ALLOW Anywhere (v6)
Apache (v6) ALLOW Anywhere (v6)
Port 80 traffic is now authorized to pass through your firewall. To check if everything went according to plan, you can go to your web browser and visit your server's public IP address (if you don't have this information, see the next heading for information).
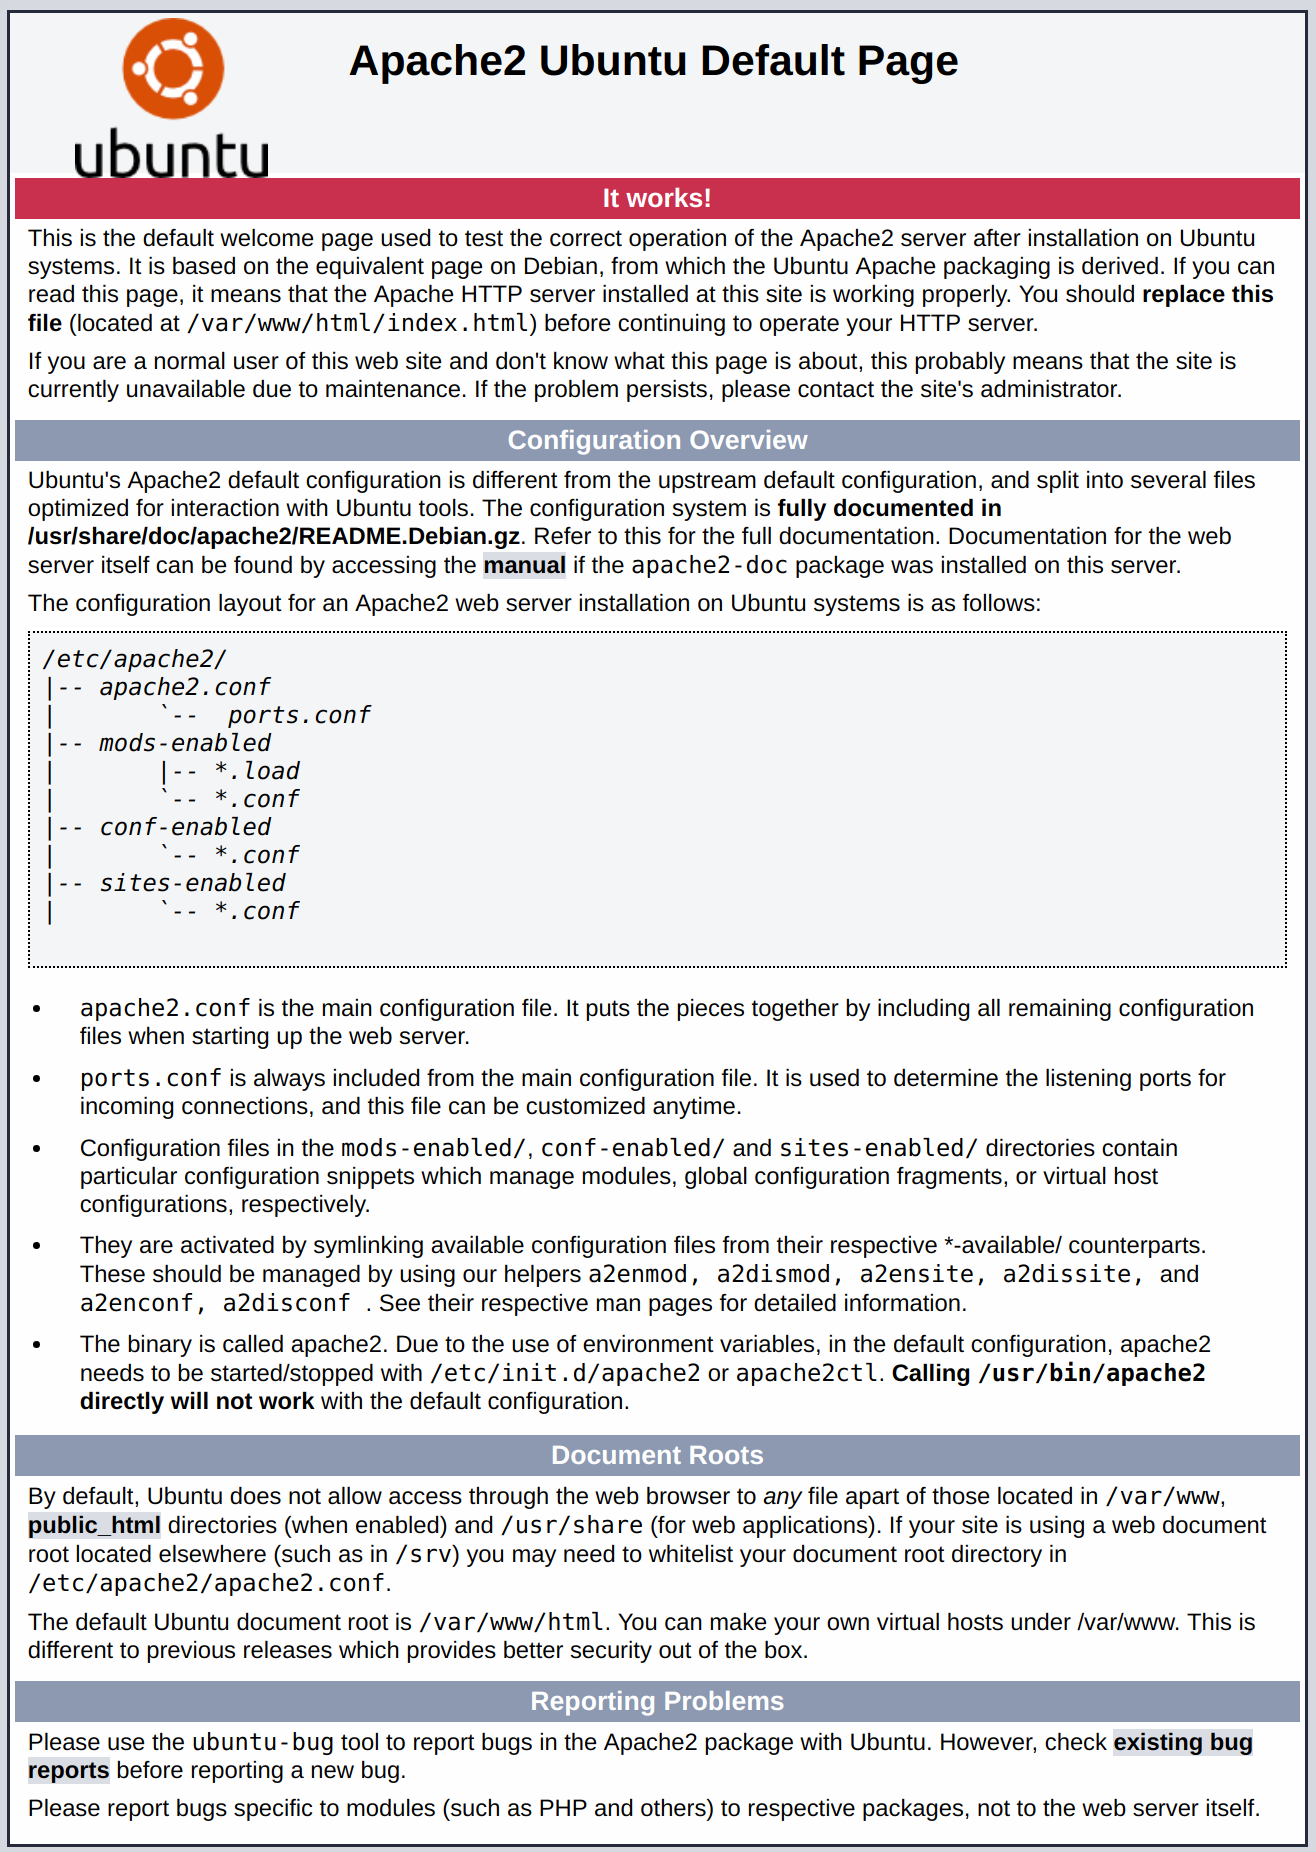
On the Ubuntu 20.04 web page, you’ll find the standard Ubuntu 20.04 apk web page. This page is there for information and testing purposes only. It should look like this:
If you’re seeing this, then you’ve successfully set up your web server and it’s now available through your firewall.
Step 2 Install MYSQL in Ubuntu 20.04
Once your web server is installed, you will need to install a database system to store and manage the data for your website. MySQL is one of the most popular database management systems used in PHP environments. Use apt to download and install this software.
sudo apt install mysql-server
When prompted, type Y and then ENTER to confirm installation.
Once the installation is complete, run the security script that comes with MySQL. The script will remove some of the insecure default settings and restrict access to your database.
To run the interactive script, run:
sudo mysql_secure_installation
Note - It’s a bit of a gamble to enable this feature. If you enable it, MySQL will throw an error if the password doesn’t meet the specified criteria. You can safely leave validation off, but always use a strong, unique password for database credentials.
Please answer Y for Yes, or anything else that you don't want to enable.
VALIDATE PASSWORD PLUGIN can be used to test passwords
and improve security. It checks the strength of password
and allows the users to set only those passwords which are
secure enough. Would you like to setup VALIDATE PASSWORD plugin?

Press y|Y for Yes, any other key for No:
If you say “yes,” you will be asked to choose a password validation level. Remember, if you enter “2” for the strongest password, you will get errors if you try to set a password that doesn’t have numbers, upper/lowercase letters, or special characters or is based on dictionary words.
There are three levels of password validation policy:

LOW    Length >= 8
MEDIUM Length >= 8, numeric, mixed case, and special characters
STRONG Length >= 8, numeric, mixed case, special characters and dictionary              file

Please enter 0 = LOW, 1 = MEDIUM and 2 = STRONG: 1
Whether you set VALIDATE PASS WORD PLUGIN or not, your server will ask you to choose and verify a password for your MySQL root user.
The MySQL root user is not the same as the system root.
The database root user is the administrative user with full access to the database system.
Even though the
MySQL root authentication method does not require a password, even if you set one, you should set a strong password here for extra security.
Let’s talk about this further.
If you have enabled password verification, you will be presented with the password strength of the root password you have just entered, and your server will prompt you to continue. If you are satisfied with the current password, click Y for “Yes”.
Estimated strength of the password: 100 Do you wish to continue with the password provided?(Press y|Y for Yes, any other key for No) : y
For the remainder of the queries, press Y and press the ENTER key at every prompt. This will delete some of the anonymous users, the test database, turn off remote root access, and load the new rules so MySQL will immediately accept your changes.
Once you are done, try logging into the MySQL console by writing:
This will be used to connect to MySQL server as admin database user root. The root user can be derived using sudo when executing this command.
You should see the following output:
Output
Welcome to the MySQL monitor.  Commands end with ; or \g.
Your MySQL connection id is 22
Server version: 8.0.19-0ubuntu5 (Ubuntu)

Copyright (c) 2000, 2020, Oracle and/or its affiliates. All rights reserved.

Oracle is a registered trademark of Oracle Corporation and/or its
affiliates. Other names may be trademarks of their respective
owners.

Type 'help;' or '\h' for help. Type '\c' to clear the current input statement.

mysql>
To exit the MySQL console, type:
Note that you do not have to provide a password when connecting as the root user. Even though you have defined a password while running the mysql_secured_installation script, you do not need to provide one when connecting as the administrative MySQL user. This is due to the default authentication method of the administrative MySQL user being unix_socket, instead of password.
This may seem like a security issue at first, but it actually increases the security of the database server because only system users with sudo permissions can log in as root MySQL users. These users can log in from the console or from an application running with these privileges.
In practice, this means that you will not be able to connect from the admin database root user to your PHP application.
Setting a password for your root MySQL account acts as a safeguard in the event that the default authentication method changes to password instead of unix_socket.
If you plan to host multiple databases on your server, you may want to consider setting up separate user accounts with fewer privileges for each database for better security.
Step 3. Install PHP in your Ubuntu 20.04
Your content will be served by Apache and your data will be stored and managed by MySQL. The
PHP package is the part of our installation that will process your code to show dynamic content to your end user.
In addition to the PHP package, you will also need to install the PHP-mysql module, which allows PHP to talk to MySQL databases. Additionally, you will need to install libapache2 -mod-php, which will allow Apache to work with PHP files.
The core PHP packages will be installed automatically as dependencies. To install them, run:
sudo apt install php libapache2-mod-php php-mysql
Once the installation is finished, you can run the following command to confirm your PHP version:
Output
Output

PHP 8.2.3 (cli) (built: Jul 5 2021 15:13:35) ( NTS ) Copyright (c) The PHP Group Zend Engine v3.4.0, Copyright (c) Zend Technologies with Zend OPcache v8.2.3, Copyright (c), by Zend Technologies
Your LAMP stack is now up and running. However, before you can run a PHP script to validate your setup, you need to set up an appropriate Apache Virtual Host to store your website files and folders. More on this in the next step.
Step 4. Create Virtual Host for WordPress
You can also create virtual hosts (like Nginx server blocks) on the Apache web server to encapsulate configuration information and host multiple domains on a single server.
In this guide, we will set up a domain named your_domain. However, you should use your own domain name.
On Ubuntu 20.04, Apache has a single server block that is enabled by default. This block is configured to only serve documents from the directory /var/etc/html. This works well for one site, but it can be inconvenient if you have multiple sites.
Instead of changing the directory structure in /var/etc, we will create a directory structure for your your_domain site. This directory structure will be the default directory to serve documents from if a client request does not match any other site.
To create your_domain's directory, create the following:
sudo mkdir /var/www/your_domain
Next, set the directory’s ownership using the environment variable $USER, which refers to the current system user.
sudo chown -R $USER:$USER /var/www/your_domain
Then, use your favorite command-line editor to open a fresh configuration file in Apache's sites-available directory. Here, we'll use nano:
sudo nano /etc/apache2/sites-available/your_domain.conf
This will generate a new empty file. Just paste in the following basic settings:
/etc/apache2/sites-available/your_domain.conf
<VirtualHost *:80>
ServerName your_domain
ServerAlias www.your_domain
ServerAdmin webmaster@localhost
DocumentRoot /var/www/your_domain
ErrorLog ${APACHE_LOG_DIR}/error.log
CustomLog ${APACHE_LOG_DIR}/access.log combined
</VirtualHost>
Once you are done saving and closing the file, press CTRL+X to close the file. If you are using nano, press Y to close the file, and then press ENTER to save the file.
This VirtualHost configuration tells Apache to use your_domain as web root directory instead of your domain name. If you want to test Apache with no domain name, remove or comment the ServerName or ServerAlias options by inserting a # character at the start of each line of each option.
Now you can enable your new virtual host by using a2enensite.
sudo a2ensite your_domain
The default website that comes with Apache should be disabled. This is necessary if you don’t have a custom domain name. Otherwise, the default configuration of Apache will override your virtual host.
To disable the default website for Apache, type:
sudo a2dissite 000-default
To make sure your configuration file doesn’t contain syntax errors, run:
sudo apache2ctl configtest
Finally, reload Apache so these changes take effect:
sudo systemctl reload apache2
Your new site is now up and running. However, the web root directory of your new domain is still empty.
Step 5. Create MySQL Database for WordPress
The first step we’ll do is a backup. WordPress uses a database called MySQL to store and manage site and user data. We already have MySQL installed, but we’ll need to create a database and user for WordPress.
Log into your MySQL root (admin) account using the following command (keep in mind that this isn’t your server’s root user):
You will be asked to enter the password you entered for your MySQL root account during the installation of the software.
Note : If you cannot access your MySQL database via root, as a sudo user you can update your root user’s password by logging into the database like so:
Once you get the MySQL response, you can change the password of the root user. Here, substitute the new_password password with a secure password of your choice.
ALTER USER 'root'@'localhost' IDENTIFIED WITH mysql_native_password BY 'new_password';
You can now type the following command to exit the database:
EXIT;
You can now log back in to the database using your password:
We can also create a separate database inside the database to manage WordPress. You can name it however you want, but in this guide we are going to use the name WordPress. You can create the database inside the database by typing:
mysql> CREATE DATABASE wordpress;
Next, we’re going to set up a unique MySQL user account, which we’ll use exclusively to manage our newly created database. Setting up unique databases and accounts helps us from a governance and security point of view. In this guide, we’ll be using the name WordPressuser, but don’t worry, you can use whatever name works best for you!
We’ll create the MySQL user account, set the password, and give them access to our newly created database using the following command:
Don’t forget to enter a strong password in the database user section where we have the password.
mysql> CREATE USER 'wordpressuser'@'%' IDENTIFIED WITH mysql_native_password BY 'password';
Next, notify the database that our WordPressuser should have full access to the database that we created.
mysql> GRANT ALL ON wordpress.* TO 'wordpressuser'@'%';
You have now a database and a user account, both created for WordPress.
We need to clear the permissions so the current MySQL instance will be aware of the latest changes we made.
In the following step, we will install some WordPress plugins by installing PHP extensions on our server.
Step 6. Install Additional Php Extension
When we built our LAMP stack we only needed a few extensions to get PHP to talk to MySQL. WordPress and a lot of plugins use extra PHP extensions. We can easily download and install some popular PHP extensions for WordPress by typing:
sudo apt update
sudo apt install php-curl php-gd php-mbstring php-xml php-xmlrpc php-soap php-intl php-zip
This will set the stage for plug-ins to be added to our WordPress site.
Apache will need to be restarted to load the new extensions. In the next section, we will do more configurations on Apache, so you can either wait or restart now to finish the PHP extension process.
sudo systemctl restart apache2
Step 7. Download and install WordPress
Now that we’ve got our server software set up, let’s download and install WordPress. It’s always a good idea to download the latest version from their site, especially for security reasons.
Once you’ve downloaded and installed WordPress, you’ll need to change the directory to something that can be writable. We recommend a temporary directory like /tmp and then download the compressed version.
cd /tmp
curl -O https://wordpress.org/latest.tar.gz
Extract the compressed file to create the WordPress directory structure:
We’re going to move these files to our document root for a while. Before we do that, we’ll add a fake.htaccess file that WordPress will be able to access later.
To create the file, type:
touch /tmp/wordpress/.htaccess
We’ll also copy over the sample configuration file to the filename that WordPress reads:
cp /tmp/wordpress/wp-config-sample.php /tmp/wordpress/wp-config.php
We can also create the upgrade directory, so that WordPress won’t run into permissions issues when trying to do this on its own following an update to its software:
mkdir /tmp/wordpress/wp-content/upgrade
We can now copy all the files in the directory into the document root. At the end of the source directory, we have a dot indicating that everything inside the directory is copied, including the hidden files (such as the file we created,.htaccess):
sudo cp -a /tmp/wordpress/. /var/www/wordpress
Ensure that you replace the /var/www/wordpress directory with the directory you have set up on your server.
Now that you've set up your server, we can proceed with the installation via the web.
Open your web browser and go to your server's domain name or IP address.
https://server_domain_or_IP
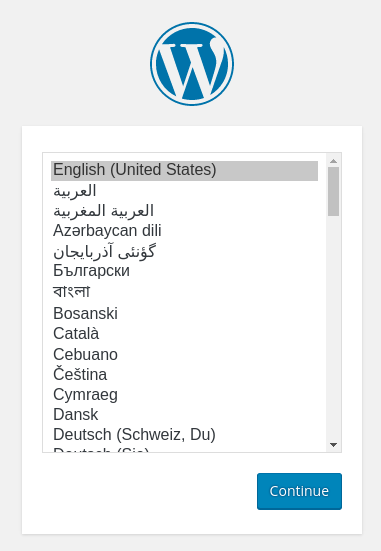
Select the language you would like to use:
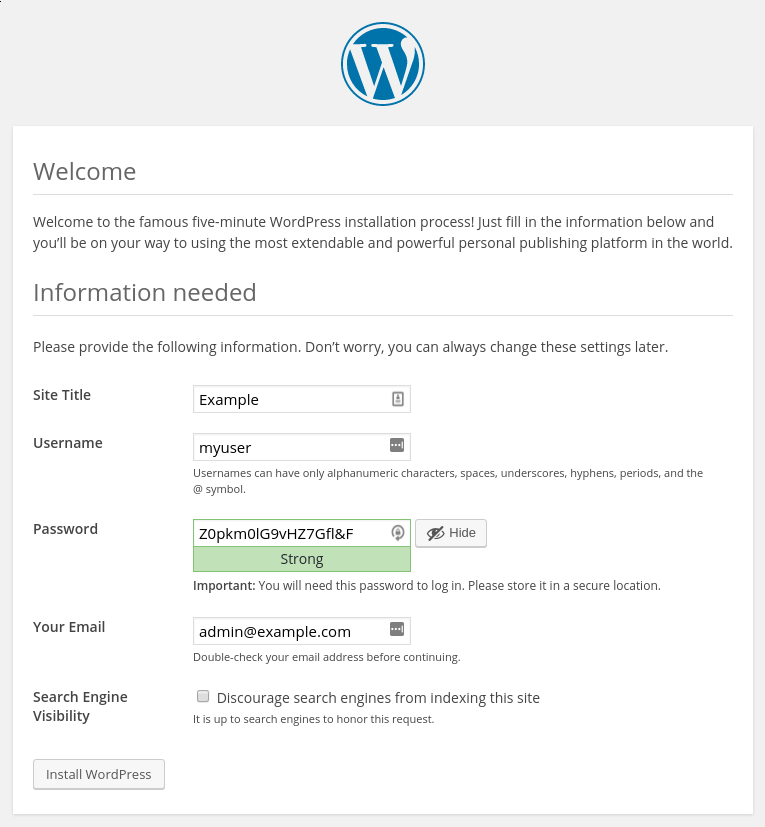
The next step is to go to the main WordPress installation page.
Choose a name for your site and select a username. It's best to go with something unique and avoid using common usernames such as "admin" for security reasons.
A strong password will be generated automatically. You can save this password or choose an alternative strong password to use.
Enter an email address and select if you want to prevent search engines from crawling your site.
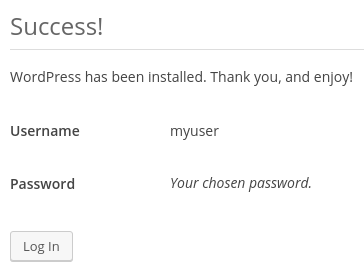
When you click ahead, you will be taken to a page that prompts you to log in:
Once you log in, you will be taken to the WordPress administration dashboard:
At this point, you can begin to design your WordPress website! If this is your first time using WordPress, explore the interface a bit to get acquainted with your new CMS.
Conclusion
Congratulations, you’ve finally got WordPress installed and ready to go!
The first thing you’ll want to do is pick your WordPress permalinks settings, which you’ll find in Settings.
You’ll also want to select a new theme from Themes in the same section.
Finally, you’ll need to install new plugins to improve the functionality of your site under Plugins.
If you’re planning on collaborating with others on your site, you might also want to add a few more users at this point under Users>Add New.
You can also find more resources for alternative ways of installing WordPress, learning about different server distributions of WordPress, automating your WordPress installs, and scaling your WordPress.


.png)
