WordPress Mail is the default email service used by WordPress. However, SMTP is better for sending emails as it can handle sending messages better. You can also use SMTP to send emails from third-party mailing services. In today's article, we'll learn how to Setup email in WordPress. Email Settings in WordPress - How to Setup Email?
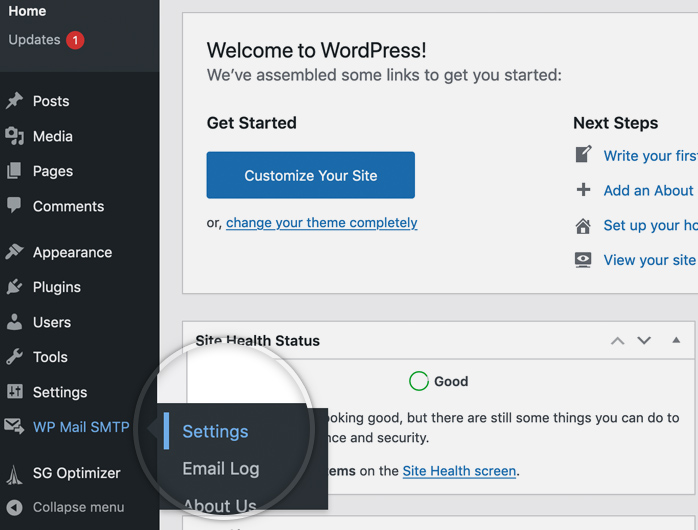
First, you will need to install a plugin called ‘WP Mail SMTP’. To do this, follow the step-by-step instructions in our WordPress Plugin Installation Guide. Once you’ve installed and activated the plugin, you’ll see a new menu named ‘WP MailSMTP’. Click on it and you’ll be taken to a page where you can configure WordPress to use SMTP.
On this page, you will find the following configuration options:
Here is a list of the email addresses and what they are configured for:
🔹 From Email: This is the email address from which you would like to send emails. For example, email: yourdomain.com
🔹 From Name: This is the name that you would like your emails to be sent from.
🔹 Mailer: This is the mailer that you would like to use. You can choose whether to use the default PHP mail().
🔹 Mailer Options: Gmail / Google Workspace Account, Mailgun / SendGrid or Other SMTP Servers.
🔹 If you select the default mode, you will be able to send the messages via the PHP mail().
🔹Without SMTP authentication, you will need to provide additional information like Client ID, Client Secret, or API key which you will need to obtain from your provider.
🔹 If you are using another SMTP server, you will be prompted to provide additional configuration details as described below.
🔹Return Path: Check if you want your emails to match the returning path of the sending email.
If you select different SMTP servers to mail to, you will be asked to add SMTP server configuration settings.
What is the SMTP Host?
The SMTP Host is the IP address or hostname of your SMTP server
The server hostname of your website can be found in the SiteTools, Email, Accounts, menu, Mail Configuration, Manual Settings tab.
◾The SMTP Port is the port your server is working on.
◾The SMTP Encryption (SSL/TLS) is available for this hostname, so select it here
◾Auto TLS - Turn on auto TLS encryption on your server if it supports it.
◾Authentication - Check if SMTP requires authentication.
◾Username - Enter your email address in the username field.
◾Password - Enter your password for your email address.
Once you’ve set up these settings, click the Save Settings button at the top of the page.
How to set up WordPress to send emails using Google/Gmail
https://connect.wpmailsmtp.com/google/and click Create
Once you have created your application, you will see your Client ID in the 'Your Credentials' section. You do not need to copy your Client ID now, as you will be able to access it from another location later.
Your application will be created in 'Internal mode' by default. To use it correctly, you must set it to 'External' and publish it.
To do this, go to the 'API & SERVICES> OAuth consent screen' in the Google Cloud Console sidebar.
Under 'User type', click on 'MAKE EXTERNAL'.
In the pop-up window, select 'In production' and click 'CONFIRM'.
On the left-hand menu, click on 'Credentials' in the 'OAuth 2.0' section.
In the 'Client ID' section, you will see the details of your web application you have just created.
To view the 'Client Secret' section, click on the pencil icon and you will see it on the right side of the page that opens.
Once you’re back on the page, scroll down to the bottom and click on the orange Allow plugin for sending emails using your google account button.
This will prompt you to log in to your google account and enable your Gmail email to be sent to wpmailsmittp.com.
Click Allow to continue.
Note: If you’re connecting a free Gmail app, you’ll see a pop-up that says “Google hasn’t approved this app.” Click Advanced, then go to “Wpmailsmtp” (unsecure) and click Allow.
If you have successfully completed all the above steps, you will be taken to the Settings page of your WordPress WPMailSMTP plugin, and you will see a notice that says “You have connected the current site to your Google API project, now you can send emails through Gmail”.
Always run a test to see if the service works after you make changes to its configuration settings. To run a test, go to the WordPress admin panel->WP Mail SMTP->Tools -> Email Test. Send a test email to your e-mail address.
If you don’t receive the test email, you need to check the configuration settings that you applied.


