Are you looking for help to make your website easier to use? WordPress is a great option if you are looking for a content management solution. You can create websites that look like they were created by professionals because of their easy-to-use design and lots of customization options. In this post, you will learn how to create a WordPress website from the ground up. Whether you are just starting a business or you want to share your latest study, we will show you how to do it.
How to Make a WordPress Website?
We all know that creating a website is one of the most important steps for any business that wants to create an online presence. You don't need to know how to code to create a website that looks and functions like a professional website. All you need is a domain name and some hosting space.
If you want to learn how to create a WordPress website, then this article will be a great resource for you. In this blog post, you will learn how to create your dream WordPress website by following 9 steps.
The first step is to register your domain name.
The second step is to choose the right WordPress hosting provider and plans according to your needs and budget.
The third step is to set up a hosting account.
The fourth step is to install plugins.
The fifth step is to add content to your website.
The last step is to launch your website.
Step 1: Domain Name Registration
The first step in creating a website is getting a domain name. A domain is an address that people type into their web browser to access a website. It’s important to choose a domain that’s memorable and reflects your brand.
To register your website, go to the Godaddy website and type the domain name you want in the search box.
You can then add the domain name to your cart and see if it’s available. Once you’ve registered a domain name, you’ll need to set up a hosting account.
Step 2: Set up a Hosting Account
To create a WordPress site, go to Vultr VPS and select the hosting plan that best suits your needs. Once you've chosen a hosting plan, you can set up your account. Here's how to set up your hosting account and get it up and running.
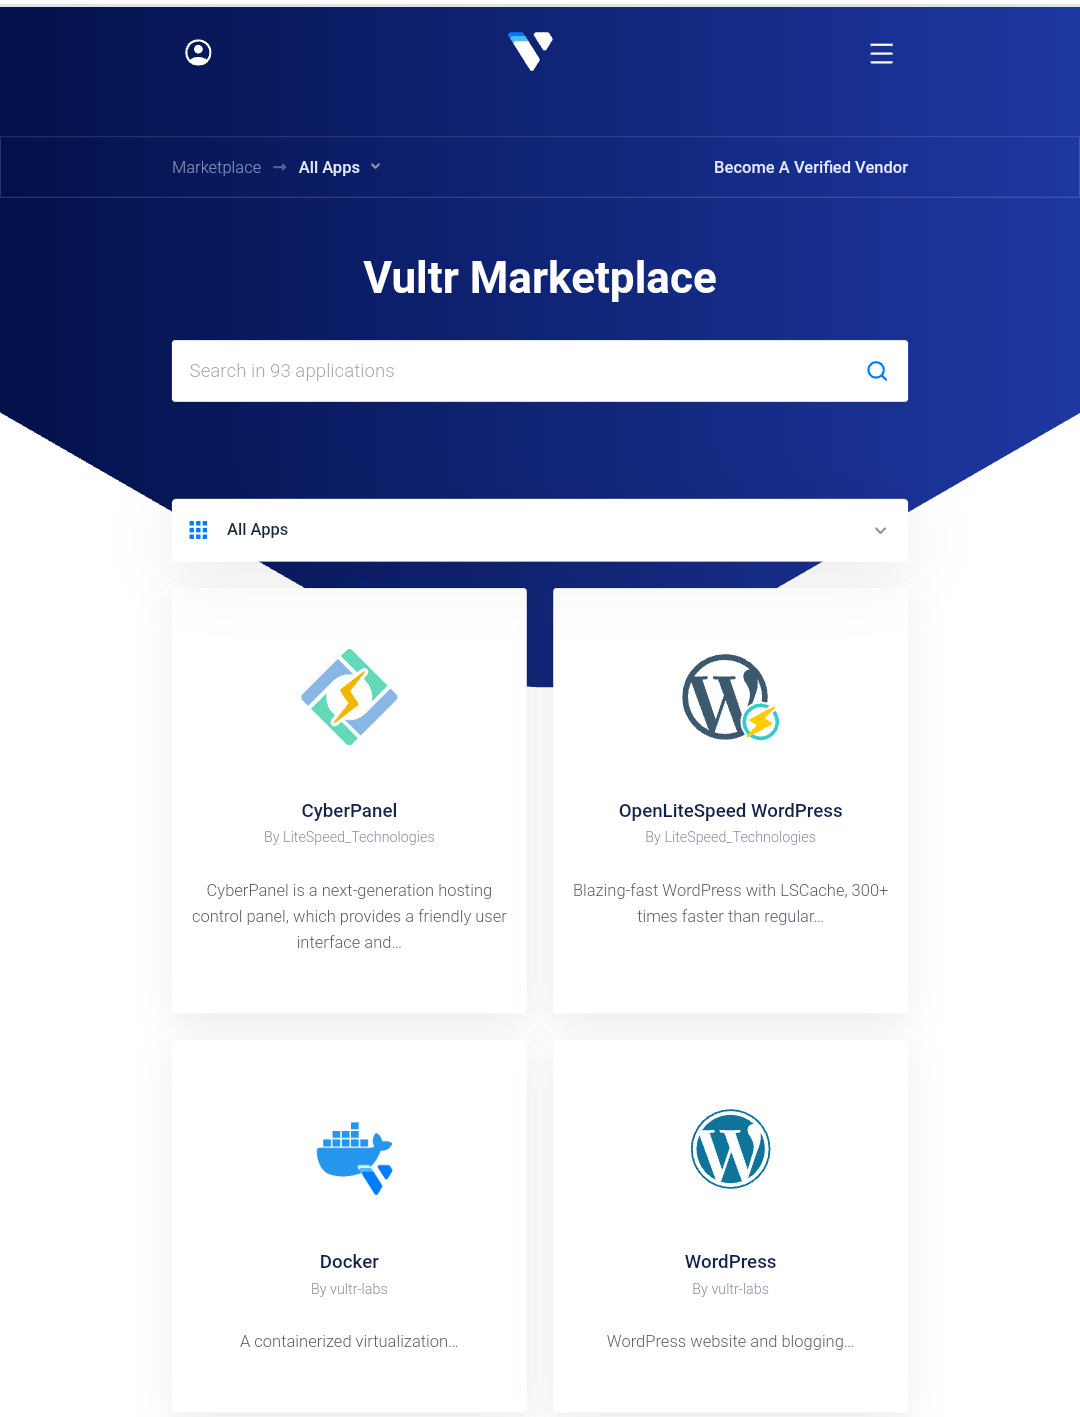
After setting up your account on Vultr, you can go to the Vultr Market Place and create your website by automatically installing WordPress on a virtual private server for $5.
After creating your account on Vultr, you will need to enter the location of your server, the operating system in which you can choose, Debian or Ubuntu. After this you have to click on Deploy New Server. After waiting for some time, you can login to your newly installed WordPress site using the given WordPress password. Along with this, you have to go to DNS and link up your domain with the IP address of this server.
You can create yourself an account on Vultr by clicking on the link below. If you create an account through this link, you will get a credit amount of $250. With which you can easily setup your WordPress website. For this you click here.
Step 3: Log in to WordPress
When you register for a hosting package through Vultr, you will be provided with a pre-installed version of WordPress. Open a new tab to check and enter your chosen web address. Your new website is now live and ready to view!
However, there are times when your domain name may not be available on the web for some time. If this is the case, try refreshing your domain name for 5-10 minutes.
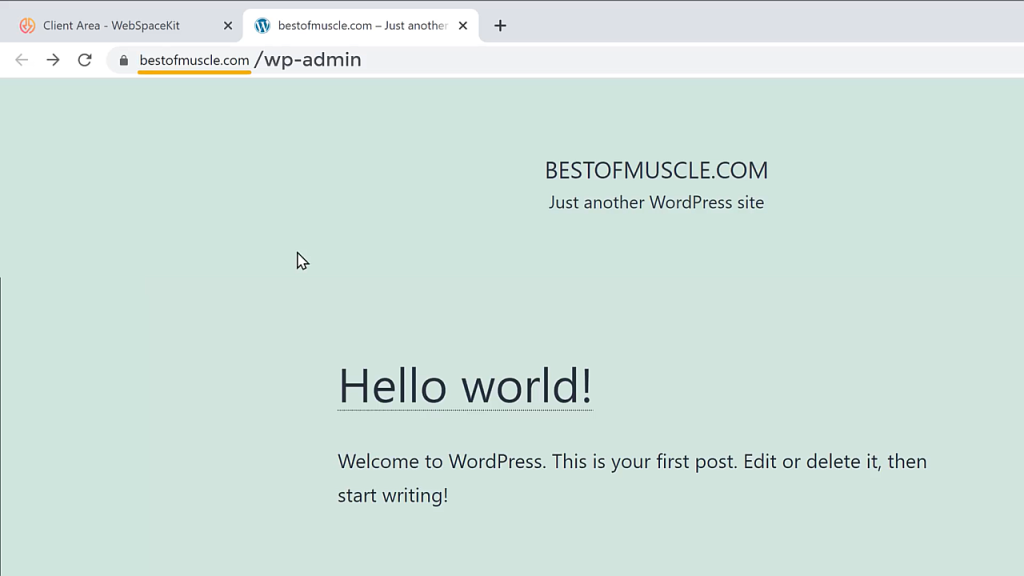
To view your WordPress dashboard, enter your domain name and click “/wp-admin”.
Enter and you’ll be redirected to this page.
Click “Log in.”
Enter your username and password from the email you received after buying your Vultr plan
You’re now on WordPress’ dashboard
Step 4: Choosing a Theme
Once you’ve signed in to WordPress, the next step is to choose a theme. You can choose from hundreds of free or paid themes to customize your WordPress site’s look and feel.
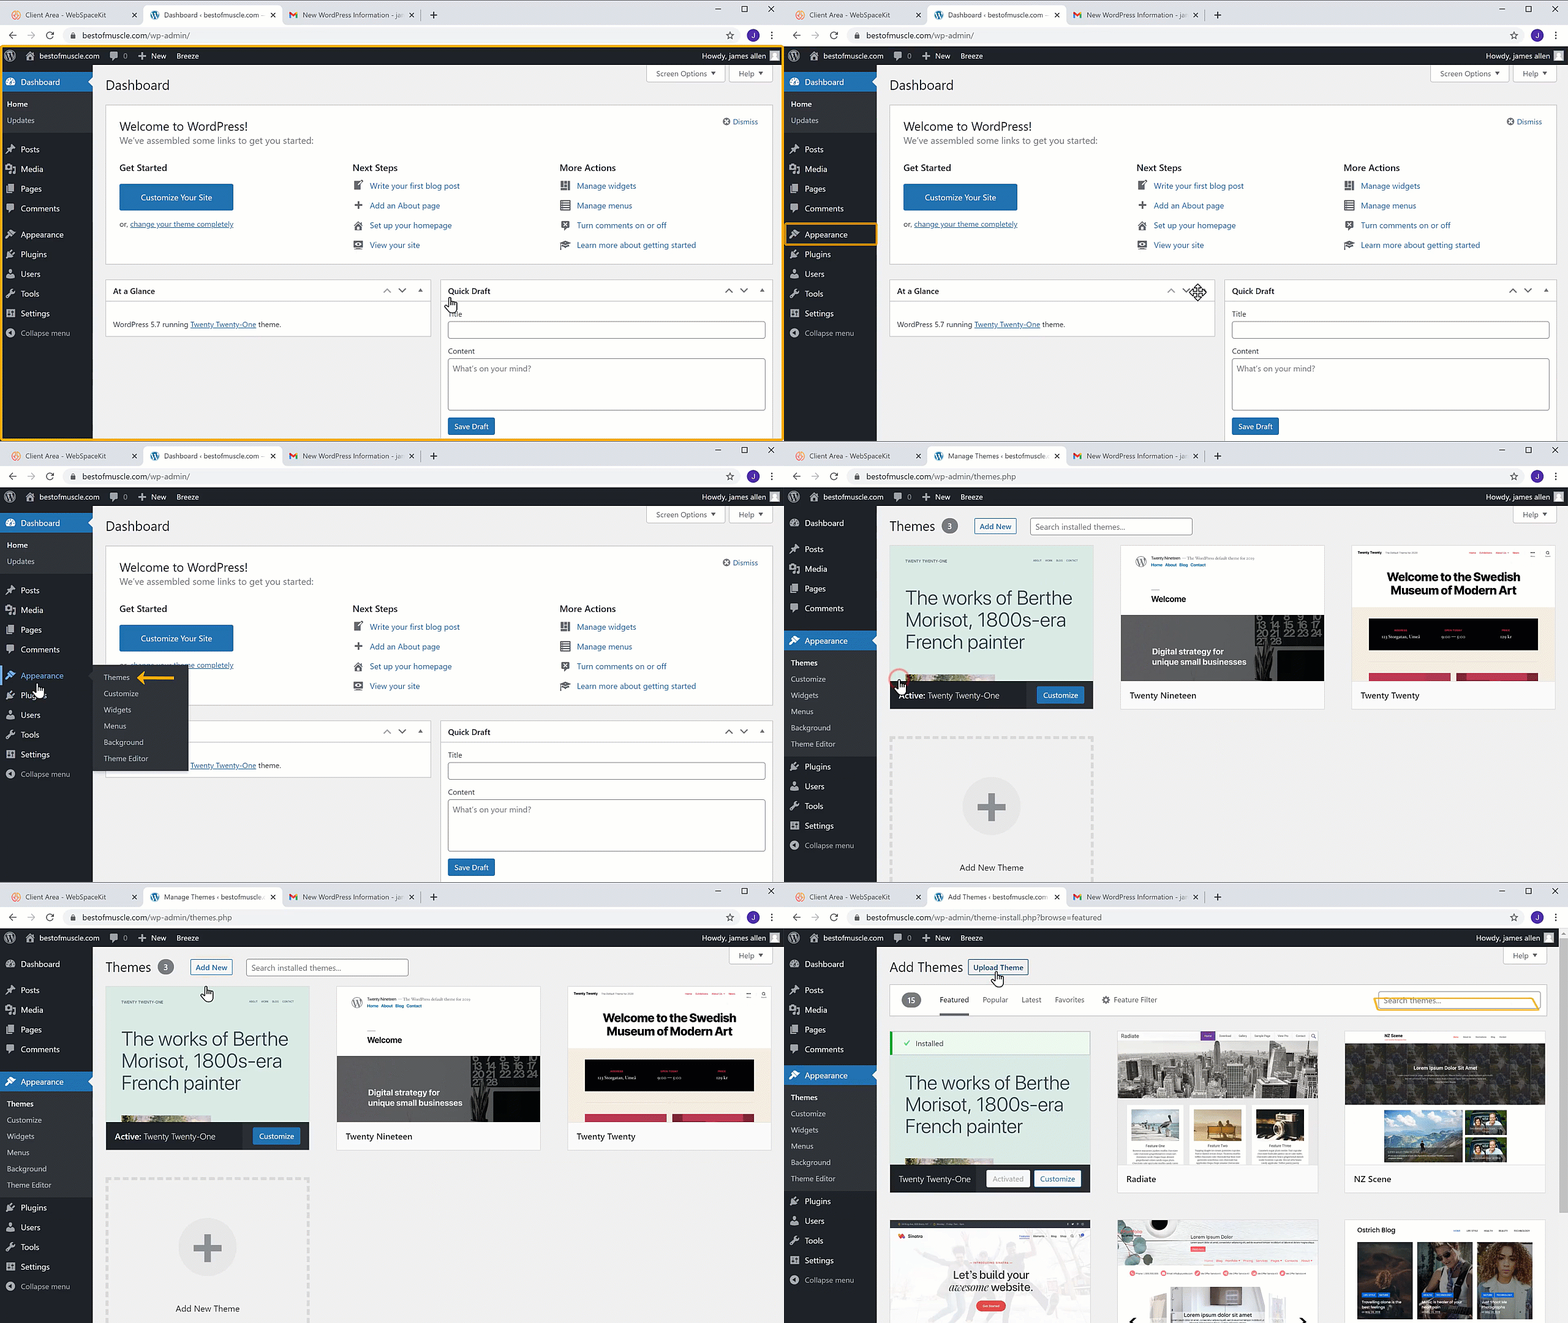
Once you’re logged in, go to your WordPress dashboard and click “Themes.” You’ll then see a list of available themes. You can browse through them or use the search box to find one that matches your needs.
Finally, select a theme from the list, click Add New, and then click Upload Theme to make it active on your site.
Step 5: Install Plugins
Plugins are programs that add functionality to your WordPress website. There are many free and paid plugins available for WordPress. Some of these plugins include social network sharing, shopping carts, and more.
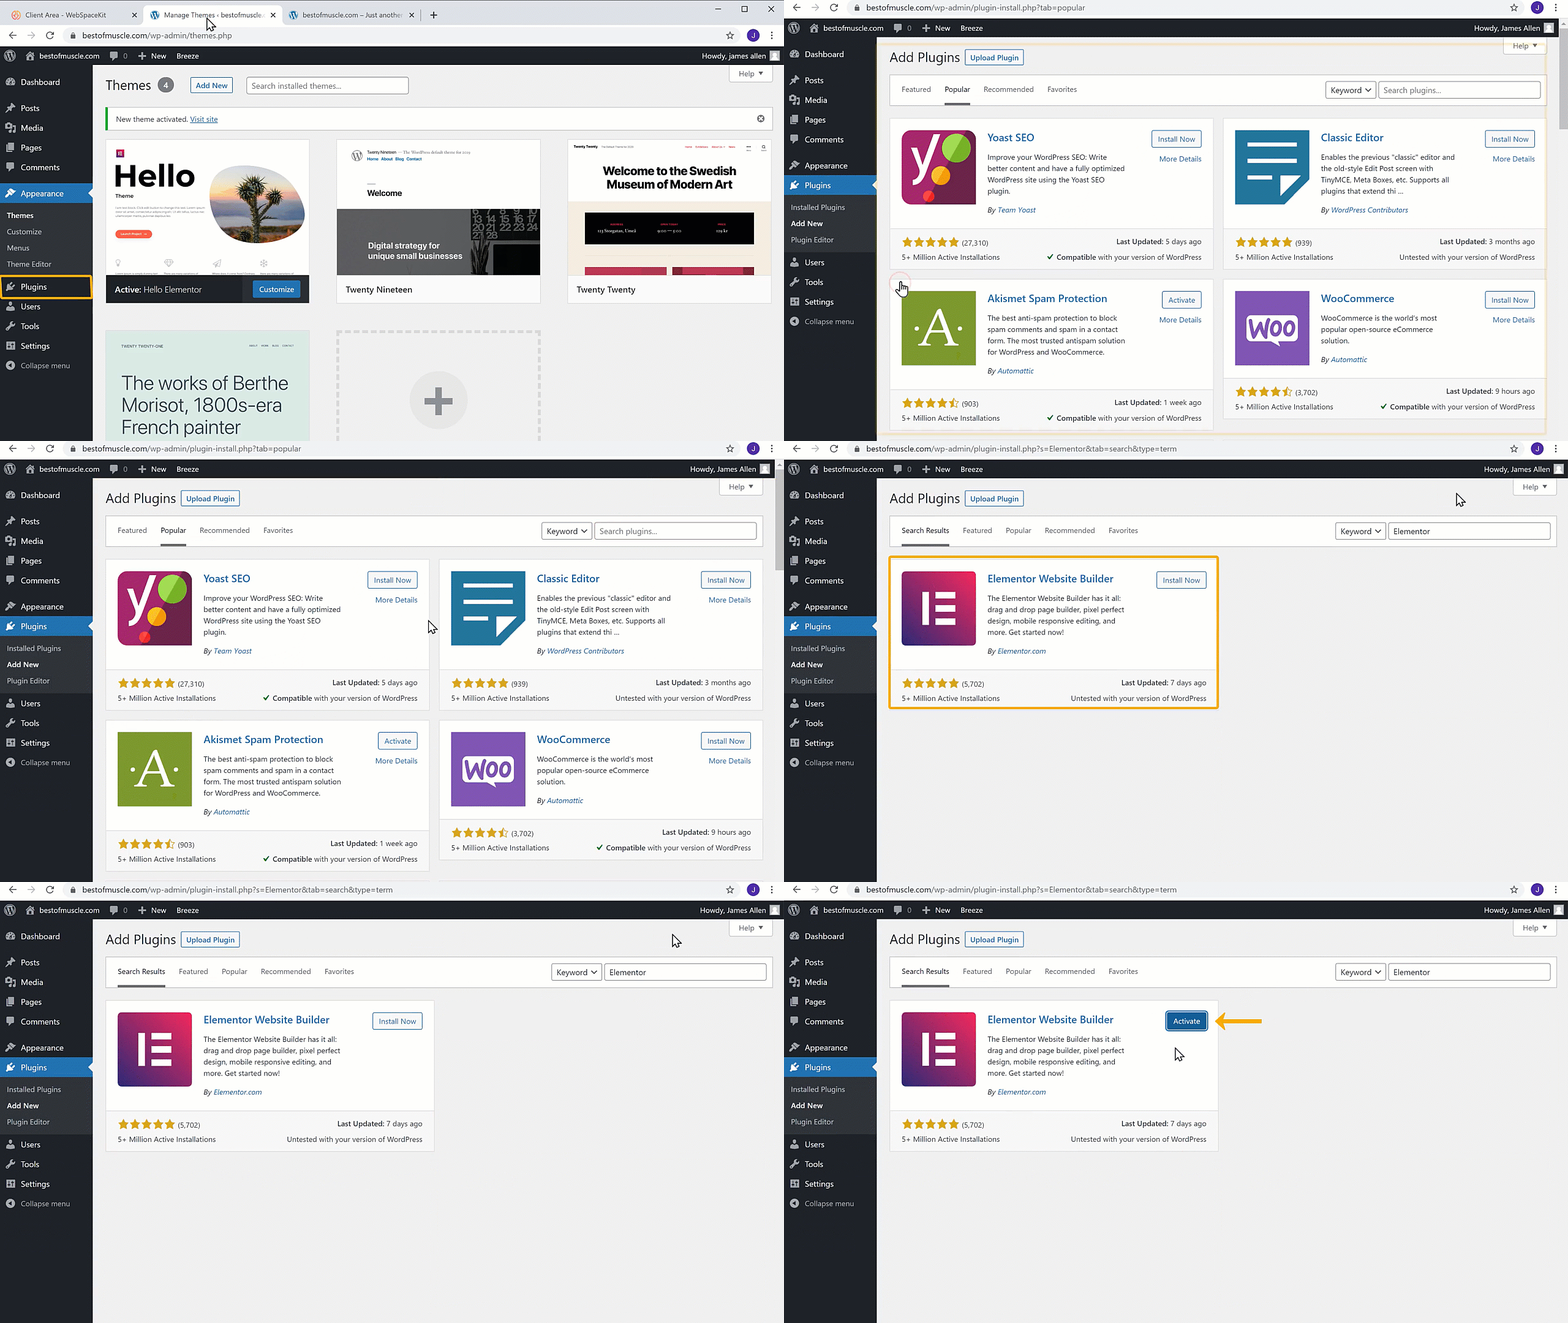
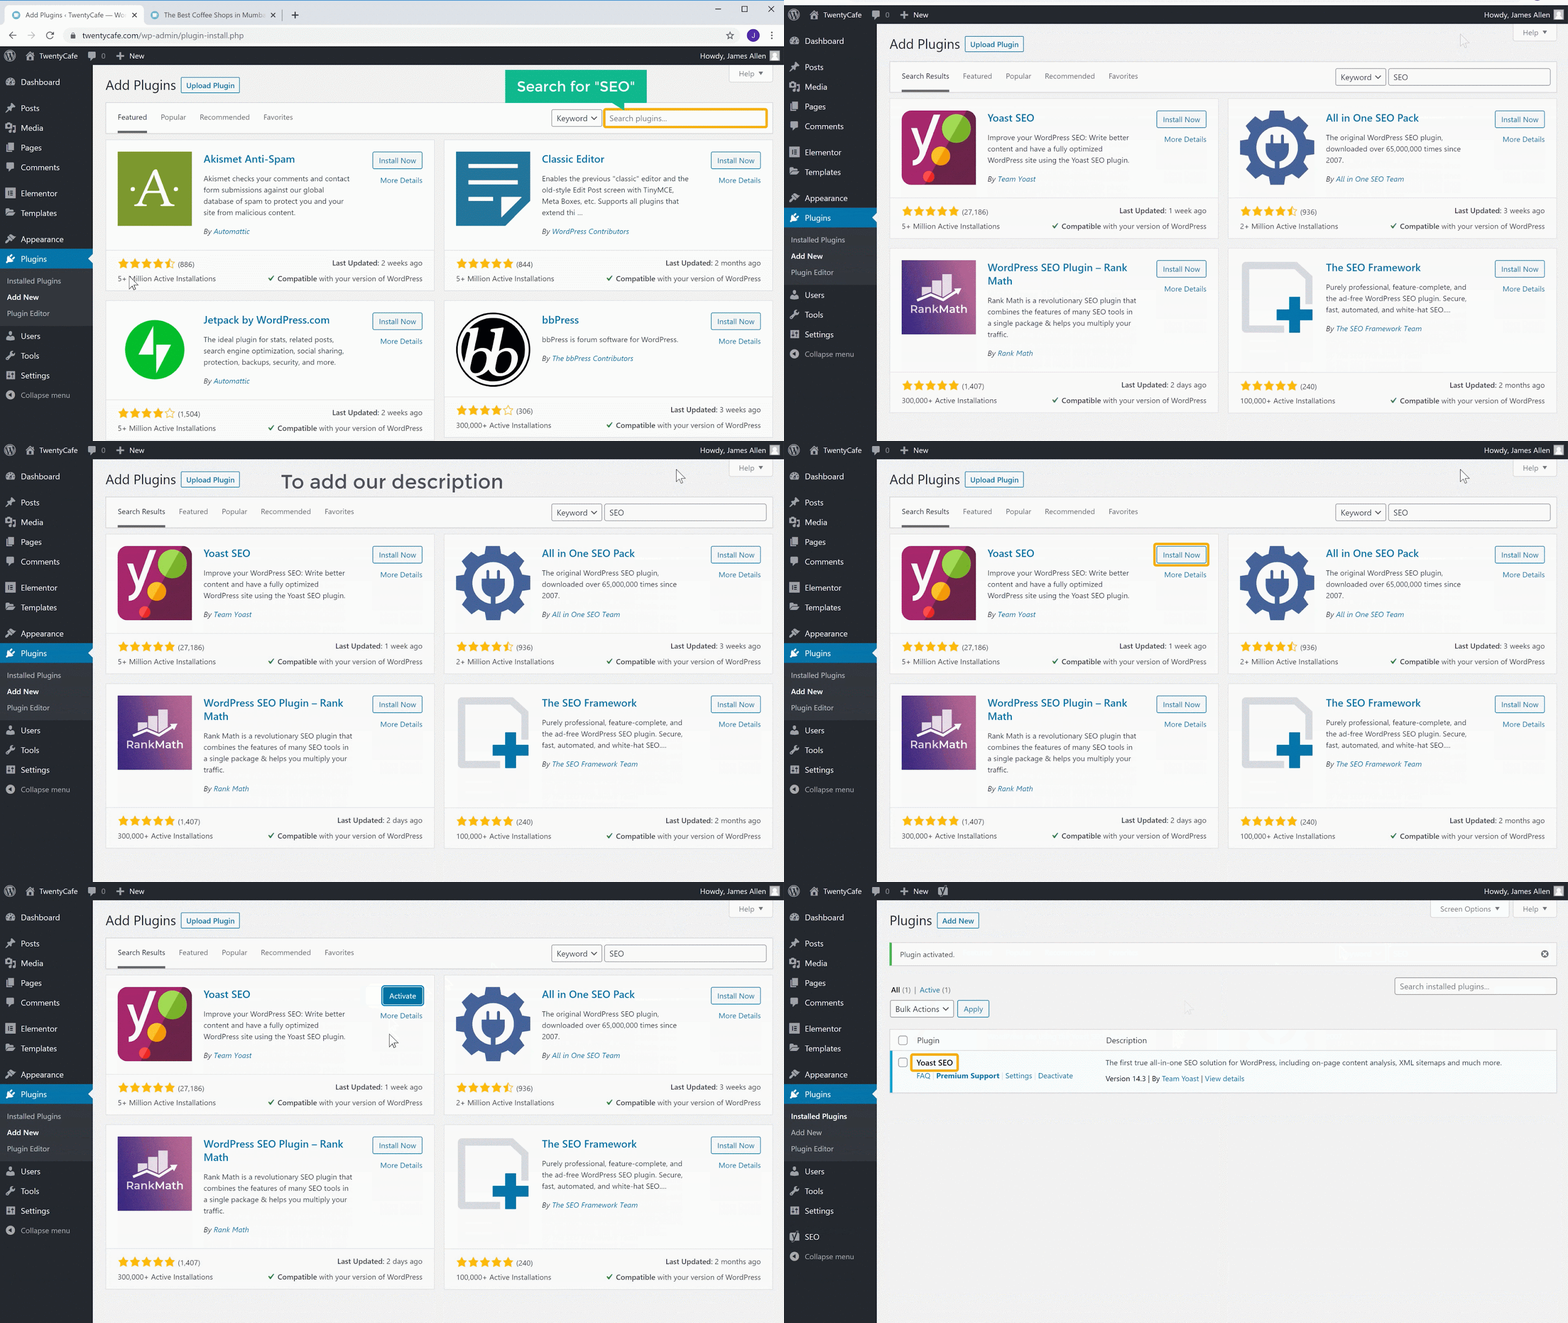
To add a plugin to your WordPress site, go to the "Plugins" > "Add New" menu in the WordPress dashboard. You can narrow your search by typing a keyword, or you can browse our list of plugins.
Once you've found a plugin that fits your needs, click "Install Now" and then "Activate" to get started.
Step 6: Adding Content and Customizing Your Site
You can also make your site unique by customizing your chosen theme. WordPress lets you choose from a variety of themes, including:
- up and down of the page
- adding a new colour scheme
- adding a picture as a background or logo
- adding widgets in site’s sidebar and footers
- creating specialized Menus
You can change your site's appearance by clicking on the "Appearance" > "Customize" menu item. You can also change the appearance of your site with the element or plugin.
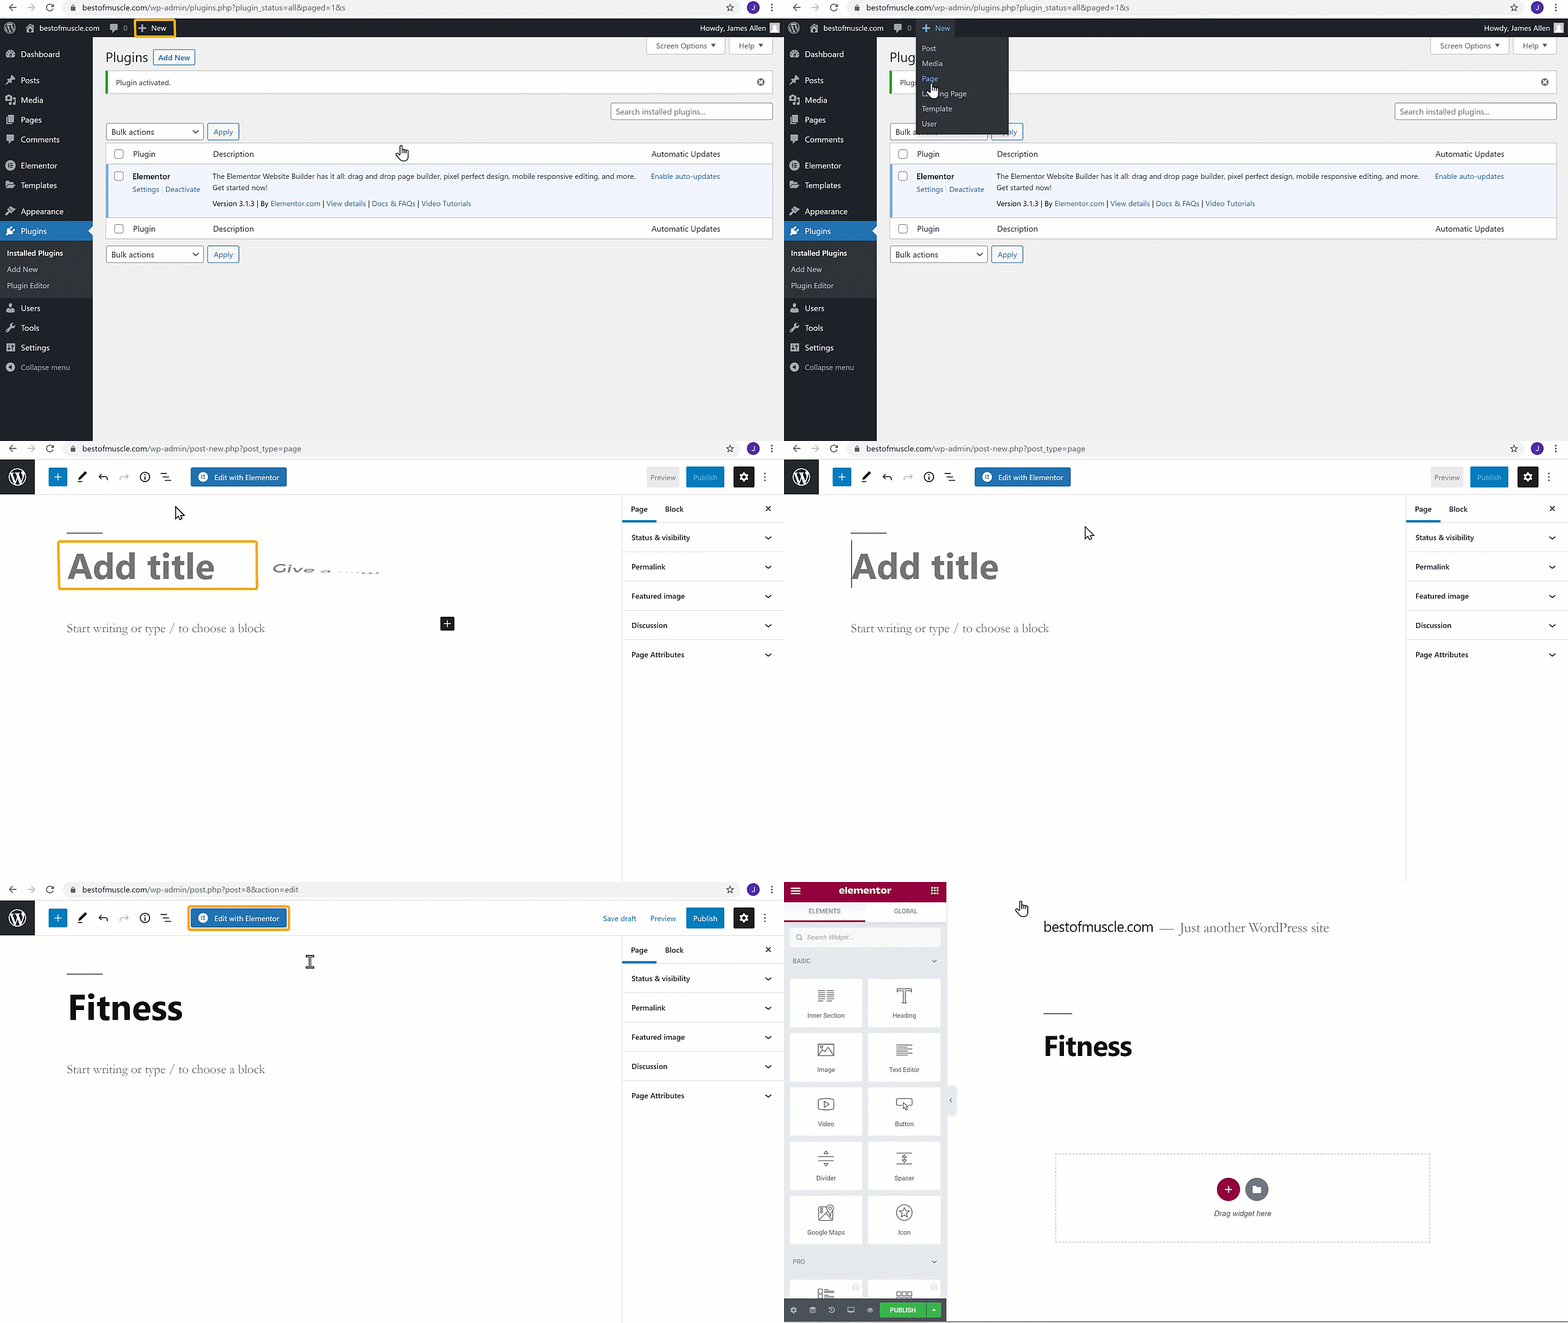
Once you've finished the site's layout, you can start working on the content. Your site's content is what brings people to your business. WordPress' in-built editor makes it easy to write and publish content.
In your WordPress dashboard, click "Pages" or "Posts" and then "Add New". The editor's features let you format your text including photos or videos and more.
Step 7: Optimizing the Performance of Your Website
Search engine optimization (SEO) techniques can help you improve your site's ranking in search engine results pages (SERPs). If you want your website to be found naturally, it needs to be optimized for search engines such as Google. There are many SEO plugins available for WordPress, including Yoast SEO, which is one of the best SEO plugins for WordPress. The Yoast SEO plugin has many useful features, such as meta tag editing and keyword research.
You can add Yoast SEO to your WordPress website by using the "Plugins" > "Add New" menu. In the search bar, type "SEO" and hit the "Install Now" button. Once the plugin is installed, you must activate it before you can configure it.
Step 8: Protect Your Website
When it comes to maintaining a website, security is a top priority. Your website's data and users' personal information could be at risk if someone breaks into or infects your WordPress-based site with malware. To protect your website, you should use a strong password, keep WordPress and plugins up-to-date, and add a security plugin.
Wordfence is one of the best security plugins for WordPress. It monitors for viruses, acts like a firewall, and provides secure login credentials. To add Wordfence, you can search for it in the plugins section of your WordPress dashboard, click on it, and then click on “Install Now.”
Step 9: Launch Your Website
Once the content and design of the website are complete, the website can be launched. When you type your domain name in a browser, it will direct you to your website.
A website should be thoroughly tested for both performance and design before it is released to the public. Your site may also receive feedback from personal contacts.
Conclusion
In conclusion, a Vultr-based WordPress website is a fast and cost-effective way to promote your business or personal brand. Even if you don’t have any coding experience, following these simple steps will give you a WordPress website that looks like it was created by a professional. Putting in a bit of time and effort into creating a beautiful and engaging website will pay off in the form of more traffic.
For more information on WordPress and how to create a WordPress website, stay tuned to BigBloggertips.


.png)

