When I first started my career in the Internet, I would put off a server migration for weeks because I knew it would cause a lot of problems. It's like the old adage, “If it's not broke, don't fix it.” Migrate Your WordPress Using All-in-One Migration .
Every year we see a huge number of new customers wanting to switch web hosts because they're not getting the services they deserve. At different Host, complementary migrations to help you make the switch. This includes moving your current cPanel (the graphical interface where you run your website and servers) to your new cPanel.
👉 Migrate WordPress site to new host Tutorial
We can help you with these migrations as long as we have a complete cPanel backup of your current host, and the backup file is not too large.
What if you don't want to migrate your whole cPanel account and just want to migrate WordPress?
What if your existing hosting providers don't support cPanel?
Reason to Migrate a WordPress Site
Before we get into the nitty-gritty of your
website's migration, let's talk about why you might want to move to a new hosting provider.
🔺Are you spending too much money on your current hosting provider?
🔺Have you had any issues with your current host's customer service?
🔺Is your current hosting service unreliable?
🔺Is there more traffic to your website than your current host can handle?
🔺Do you plan on upgrading your website and need more server support?
🔺Will you be adding a content management system (CMS) that your current host does not support?
🔺Does your website require a new server that only it has access to?
If you've answered "yes" to any of the above questions, a WP migration may be the right choice for your website. Check out the hosting provider we provide at Big blogger tips.
How to Use All-in-One Migration Plugin
In 2013, the lovely people at ServMask came up with a plugin called “All-in-One WordPress Migration plugin”. This plugin allows you to migrate your WordPress website with just a couple of clicks.
This plugin is aimed at website owners who don't have a lot of technical knowledge. This means that you can migrate your website even if you're not a tech-savvy person.
If you use this plugin, you'll get the following benefits:
🔺You can use it in your native language
🔺You'll be able to upload other custom files, like plugins and theme folders
🔺You'll get a new website URL during import
🔺It works on mobile devices
🔺You won't have to worry about host or operating system limitations
🔺It's accessible to people with disabilities
Government organizations like the state of California, state of Hawaii, state of Massachusetts, Harvard University, state of Delaware, state of Maine, state of New York, state of Oregon, state of Utah, state of Vermont, state of Virginia, state of Washington, state of Wisconsin, state of Virginia and state of Wisconsin.
In order to impress such renowned organizations, the plugin had to go through rigorous testing and, in the end, was successful. This proves that your website can rely on the plugin for your host migration as well.
You don't need to stress about your data depending on traditional WordPress hosting because the All-In-One WordPress Plugin relies on cloud WordPress hosting.
The plugin complies with General Data Protection Regulation (GDPR) which means that your personal data will be protected.
You can find more information about the privacy policy for the plugin here.
And the best part is that using the plugin is absolutely free.
Are you ready to move your WordPress site from one hosting provider to another? Here are the simple steps you can follow:
Install the All-in-One WP Migration Plugin at your old host and Export & Import backup to new Hosting
First, you’ll need to migrate your WordPress site from the host you are moving to.
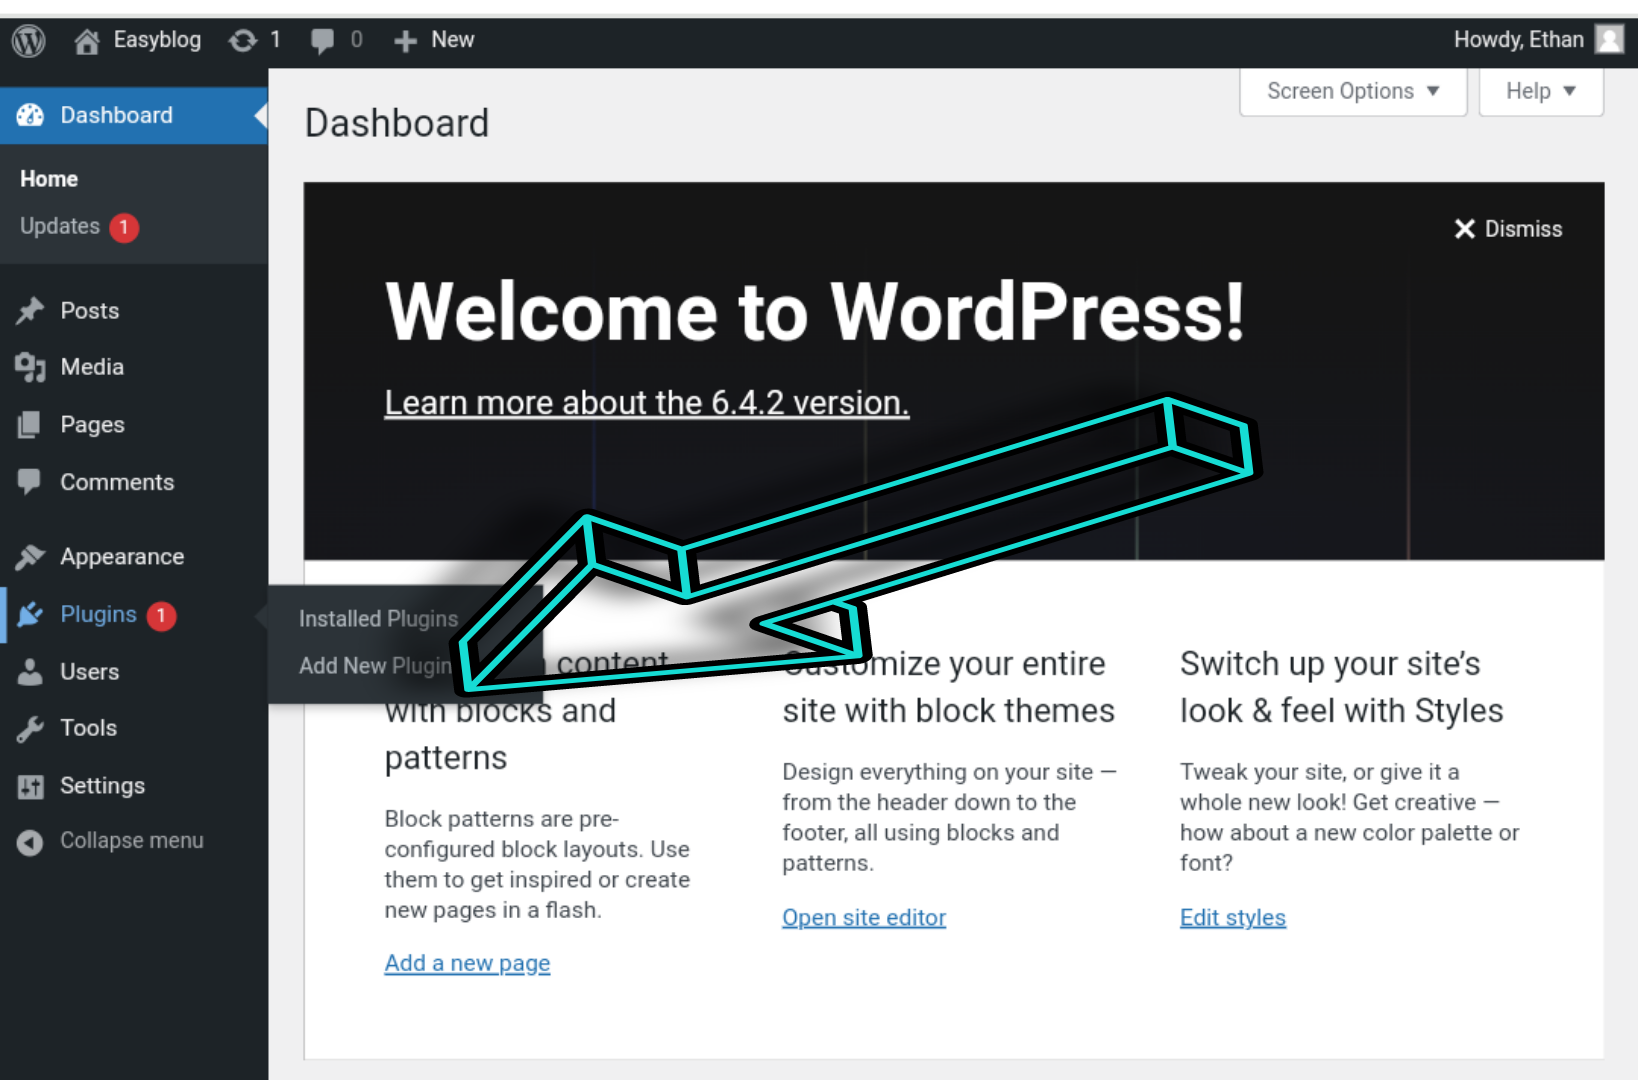
To migrate your site, log into your Wp-admin to see your WordPress dashboard.
Once you’re logged in, go to the Plugins menu and click Add New.
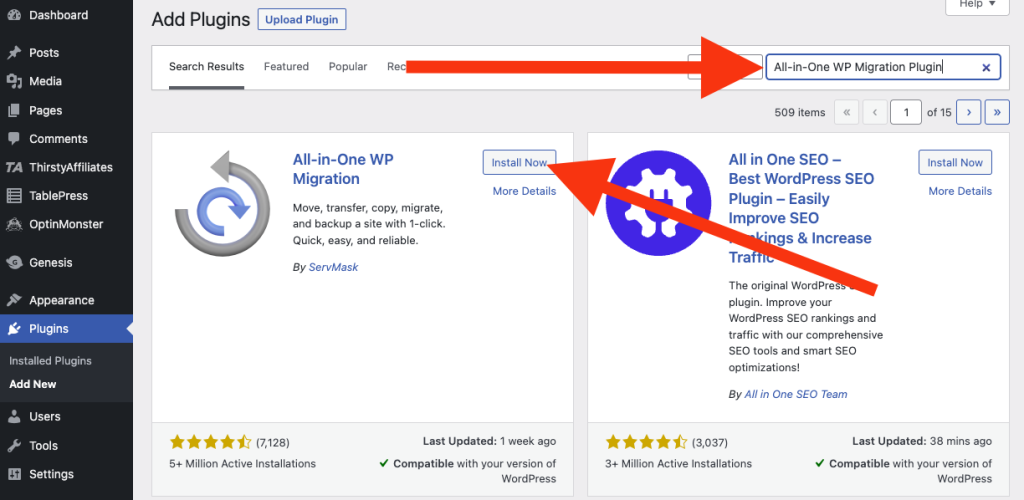
Once here, type in All-in-One WP Migration Plugin and press enter. As the admin user, you can then click Install Now:
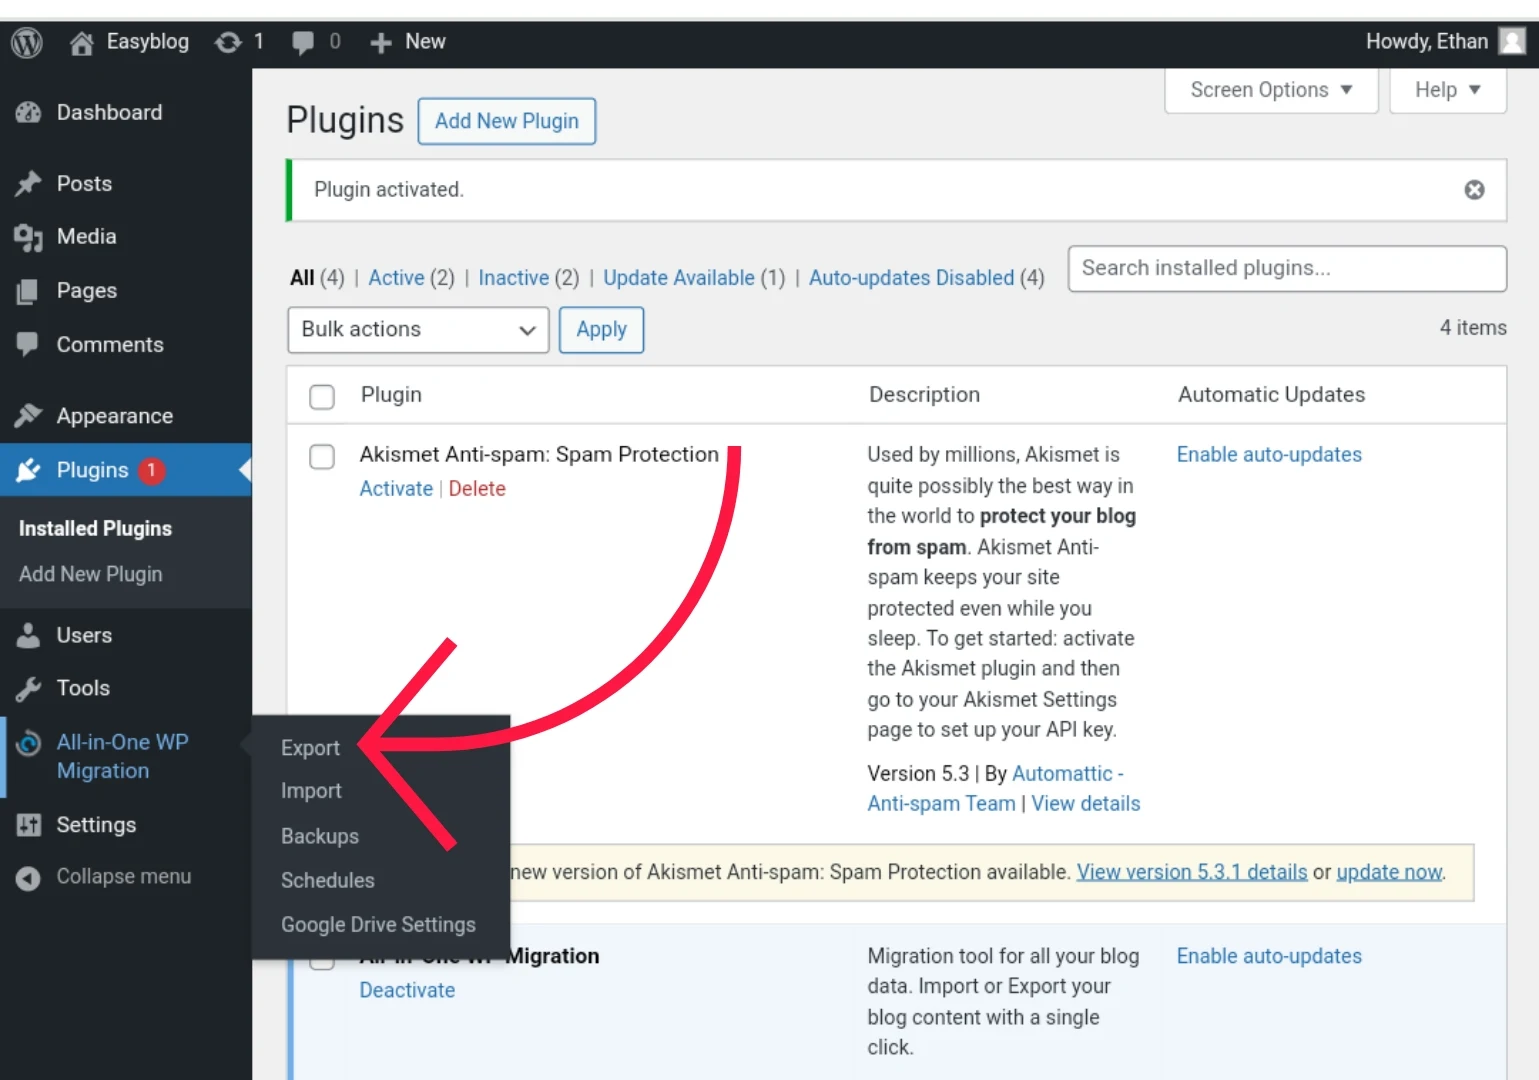
Once installed, you have to Activate it. If you don’t do this, it will just remain dormant among your installed files:
Backup Your WordPress Using All-in-One Migration GDrive Extension
You have now installed the plugin “All-in-One Migration” on your old WP site. In this tutorial we will show you how to back up your WP site on google drive and migrate your WP site to your new WP hosting.
To migrate your WP site from Google Drive to your new hosting, you need to download the Gdrive Extension called “All-In-One Migration Gdrive Extension”. You can download it by clicking the link below.
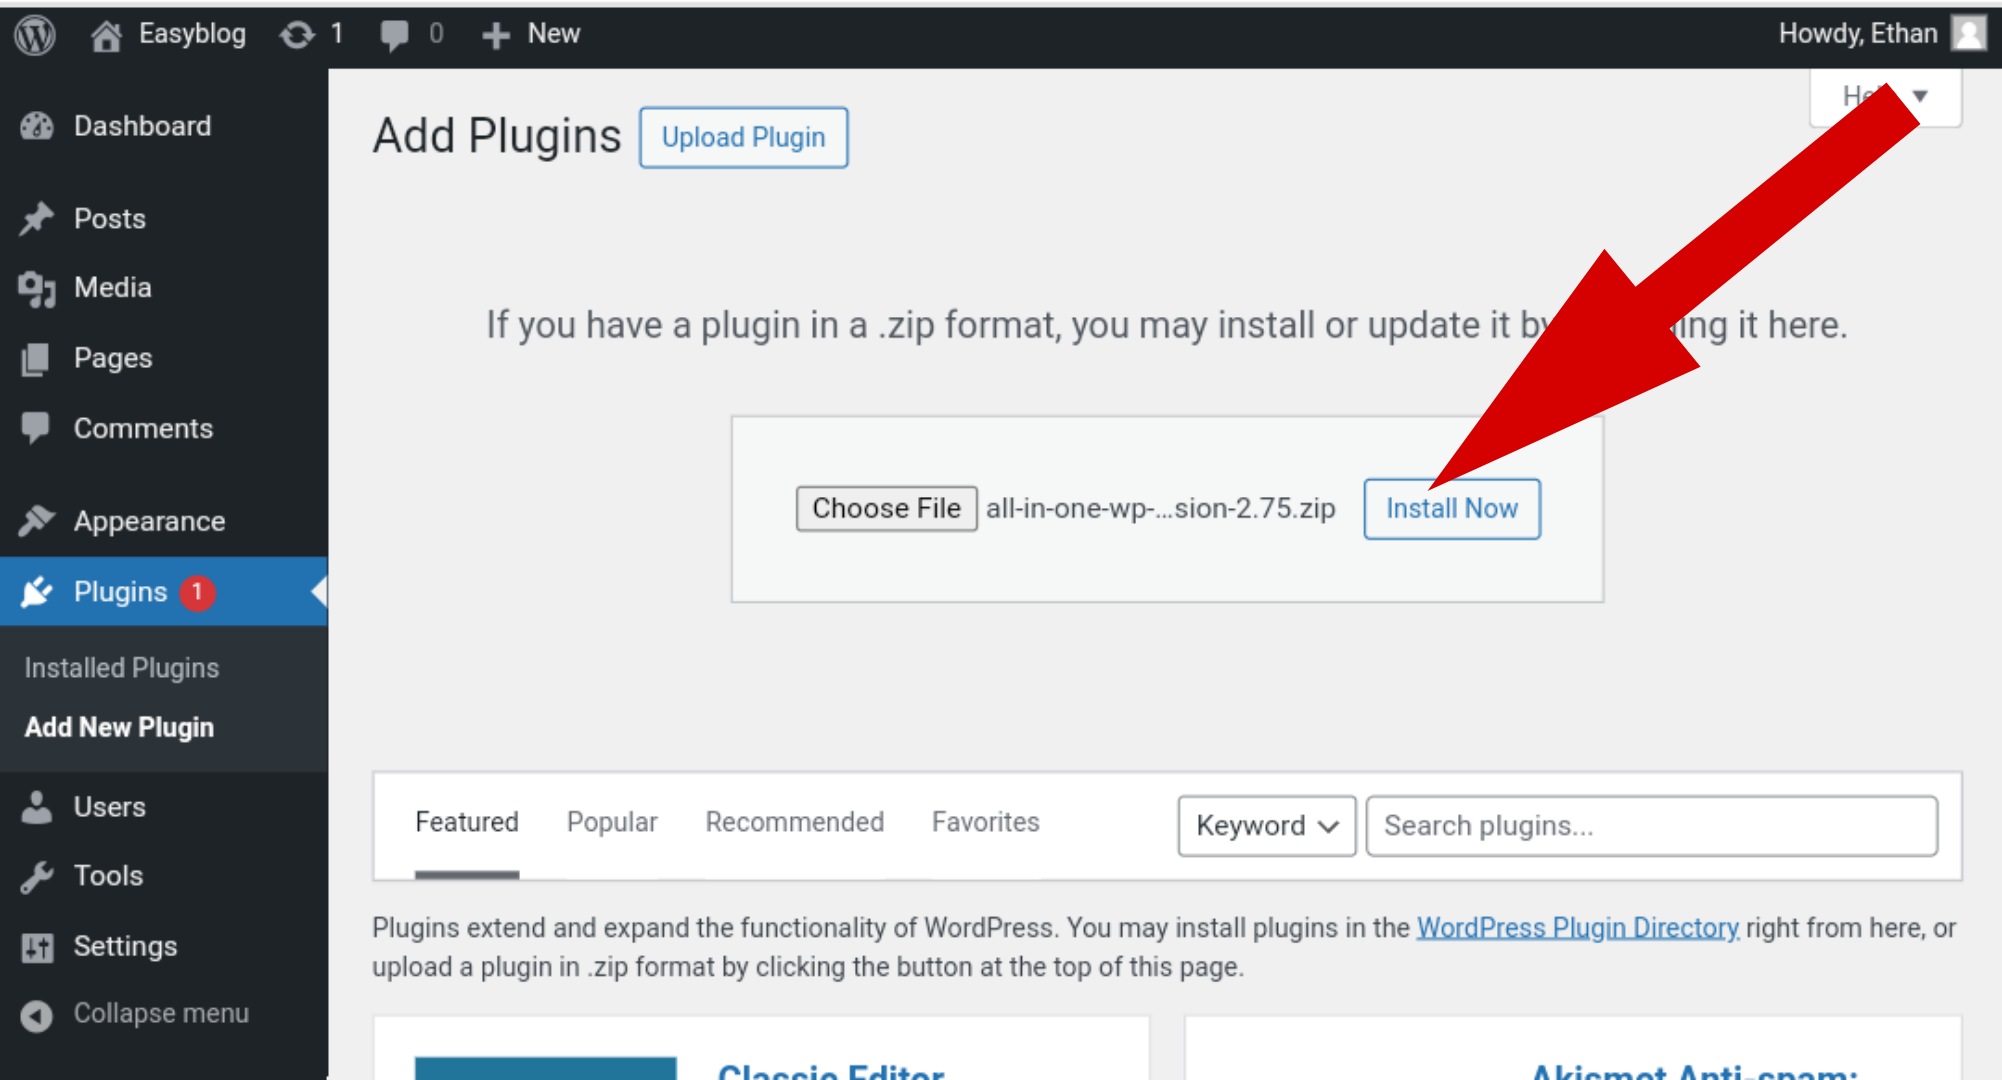
Now you have to go to the dashboard of your old WordPress and from here you can install the downloaded file for your WordPress plugin.
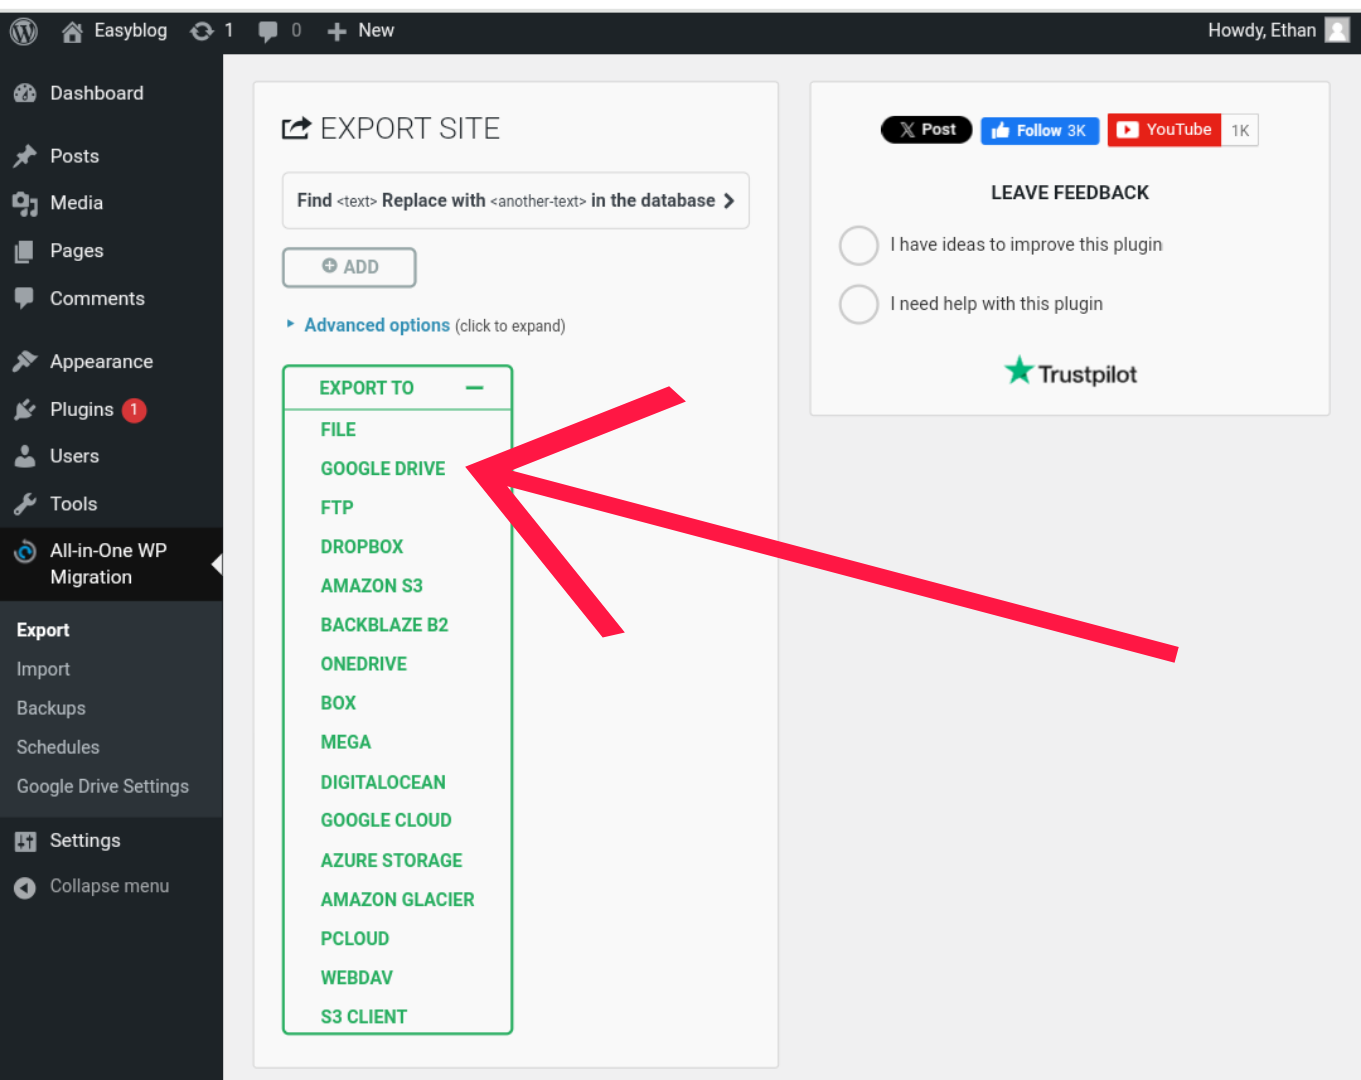
After uploading and installing GDrive Extension, you have to activate it. After this you will have to go to the menu of All-in-one Migration. After coming here you will have to click on Export.
A new page will pop up near you. Click on it.
Choose Google Drive.
Next, connect it to your google drive account.
Backup all your WordPress data to your google drive.
This will allow you to back up your WordPress website to Google Drive.
To migrate your WordPress to the new WordPress hosting, go back to your new WordPress dashboard and install All-in-Migration plugin along with Gdrive Extension.
Connect your Google Drive account again.
Click on Import and install the previous or previous WordPress backup you have made on the new WordPress hosting.
How long does it take to migrate your WordPress? The time depends on your WordPress hosting. For example, we migrated a 2GB big WordPress website in just 20 minutes using this plugin.
You can then navigate to the Import Wizard. Click Continue and follow the instructions. If you do not click Continue, your website will not change.
Once complete, you’ll get a success box such as this:
You can then click on the link called Permalinks Settings and make sure you save it twice:
Conclusion
What did you get out of today’s article?
In today’s post, we’ve provided you with all the information you need to know about Migrate your WordPress using all-in-one migration.
I hope you’ve enjoyed what we’ve shared with you today.
If you have any queries or suggestions regarding this topic, feel free to leave us a comment below.


